Homework: High Throughput Povray with Makeflow and Work Queue
A ray-tracing tool creates very precise computer images from a detailed geometric specification. Unlike other forms of computer graphics, ray-tracing is very slow, because it computes exactly how a single beam of light propagates through a scene to arrive at each pixel on the screen. Ray-tracing is too slow to be used in real-time for, say, a computer game. Instead, it is used when quality is more important than speed, such as when rendering a high quality movie.Rending a single frame of a Hollywood-quality movie may take minutes to hours even on a very fast computer. Rendering a movie measured in hours would take decades on a single computer. Fortunately, this is a perfect application of high-throughput computing. Each frame of a movie can be rendered on a different computer simultaneously, and then assembled at the end to produce a complete movie.
In this assignment, you will learn the basics of POVRay, an open source ray-tracing tool, and then use Work Queue to perform high-throughput generation of simple movies.
Quick Introduction to POVRay
POVRay is a widely-used open source ray-tracer that can be run in batch mode on the command line or with a graphical display. You will also need ffmpeg, a video processing tool. Using these steps both can be installed in a master instance:sudo rpm --import http://li.nux.ro/download/nux/RPM-GPG-KEY-nux.ro sudo rpm -Uvh http://li.nux.ro/download/nux/dextop/el7/x86_64/nux-dextop-release-0-5.el7.nux.noarch.rpm sudo yum install ffmpeg ffmpeg-devel -y wget http://www.povray.org/redirect/www.povray.org/ftp/pub/povray/Old-Versions/Official-3.62/Linux/povlinux-3.6.tgz tar xzvf povlinux-3.6.tgz cd povray-3.6 sudo ./install -no-arch-checkThey should already be installed here on the UA HPC:
export PATH=/home/u10/nirav/povray-tutorial/bin:$PATHThen, download these example files:
wget http://ccl.cse.nd.edu/software/tutorials/acic17/rubiks.pov
wget http://ccl.cse.nd.edu/software/tutorials/acic17/WRC_RubiksCube.inc
You can try out other examples from the POVRay collections site..
To render a single image of a Rubik's cube:
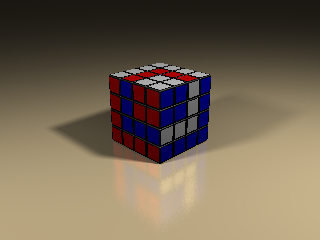
povray +Irubiks.pov +Orubiks.pngWhich produces an image like this:

Now, open up rubiks.pov in a text editor. The POVRay language describes exactly how to render the image, and the elements are fairly self explanatory. Scroll to the bottom, and look for the invocation of the cube:
object
{
WRC_RubiksRevenge("F'f' Rrd2R'r' U'u'Rr d2 U ld'l' U' ldl' R'r'Uu Ff")
translate < -6.6/2, 0, -6.6/2 >
rotate y*45
}
WRC_RubiksRevenge is just a function defined in WRC_RubiksCube.inc, and the funny string following it simply defines how to set up the cubes and the colors. translate just moves the cube in the x, y, and z, directions, and rotate spins it around the Y axis by 45 degrees. (The cube is 6.5 centimeters on each edge, so the translate is just moving the rotation axis to the middle of the cube.)
Add a few more cubes to the scene by copying the object clause three or four times. For each one, tweak the rotation and add a second translate after the rotate to move the new cubes around the scene. Adjust the settings until you have a couple of cubes in the view.
Now, how do we make a movie? POVRay uses the built-in clock variable to represent the passage of time. clock is a floating point that varies only from zero to one through the course of an animation. You can set the clock value to, say, 0.5 by using the option +K.5.
For example, change one of the rotation statements to:
rotate y*(45+clock*360)Render three slightly different frames like this:
povray +Irubiks.pov +Oframe000.png +K.0
povray +Irubiks.pov +Oframe001.png +K.1
povray +Irubiks.pov +Oframe002.png +K.2
And then join them into a movie like this:
ffmpeg -r 10 -i frame%03d.png -r ntsc movie.mpgUsing PSFTP or a similar tool, you can download the movie to your laptop and play it.
The Assignment
Create a program that renders a long movie quickly by creating a large number of frames and then stitching them together with the ffmpeg program. The program should be invoked like this:render_movie 25 scene.pov scene.movThe first argument gives the number of seconds of movie to render, the second, the povray input file, and the third the name of the output movie file.
Write a script that generates a single large Makeflow file specifying the total amount of work to be done, then runs Makeflow in Work Queue mode to do the work.
Note: Make a point of deleting all of your .png files when each movie is completed, otherwise you may run out of disk space!
What to Turn In
See Prof. Merchant for detailed directions on turning in. You should submit the:- source code for your program,
- the modified povray input file,
- a png of the produced makeflow (using makeflow_viz and graphviz),
- graph of the makeflow log showing the number of waiting, running, and completed tasks (hint makeflow_graph_log),
- the corresponding movie that is at least 30 seconds long at 10 frames per second.